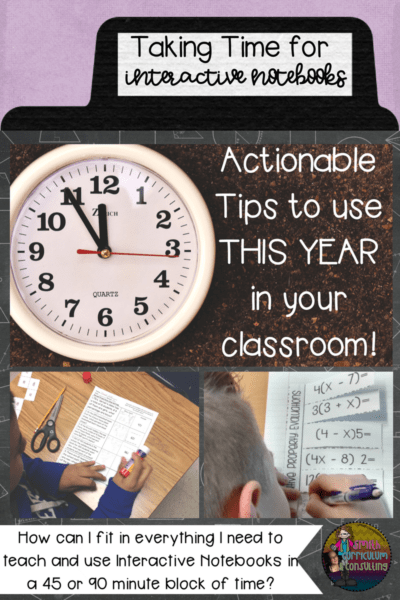
Last month I brought up planning as what I think is the most important factor in implementing Interactive Notebooks into your classroom. After that blog post I received numerous questions and comments asking, “How do you fit everything in during each class time?” What a great question! After giving a few quick responses, I decided that I had to share with all of my friends just how I fit it all in.
What is your time frame?
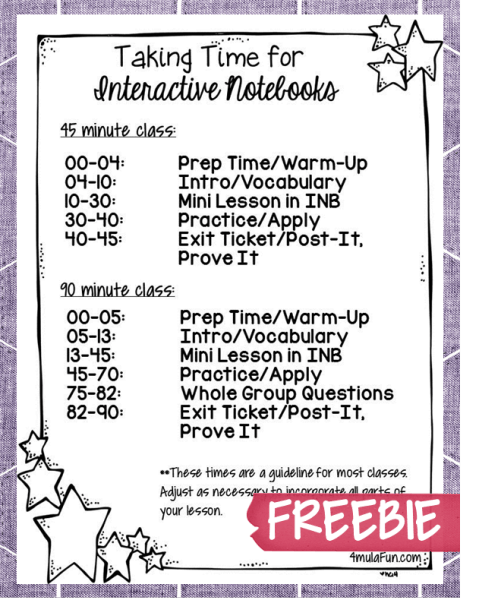
Do you have a 45 minutes class? a 90 minute class? a rotating schedule? a self-contained class that has rough timelines? As soon as I saw on my schedule of classes last summer that each were between 48 and 52 minutes long, 5 days a week I knew that my time frame for fitting in all the necessary components of my lessons was a magical 48 minutes.
How do you plan for your time frame?
From day one in my classroom I was notorious for being a “Structure Sergeant“; yep, that’s a nice way of putting it.
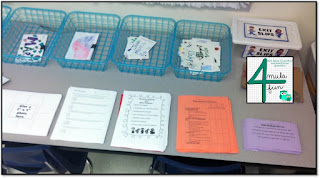
When students walking into my classroom they quickly gather all materials needed for the daily lesson. Once they are at their desk they spend NO MORE THAN 3-5 minutes prepping their Interactive Notebook for that day’s activities. This includes updating the Table of Contents, writing the date on the page, and cutting out anything and everything and gluing down the bones of the lesson.
I always post a skeleton copy (bare bones, nothing completed) as a picture on my computer to project for all students to see as this gives me the necessary time to complete those teacher tasks such as attendance, etc. before getting stated.
 Once the prep time is complete, we move right into our intro of our lesson. This is when I have a student read the “I Can Statement” for the day and we talk about what we will be doing as a component of that statement and break down some key vocabulary that might be in it and if one of those words happens to be a vocabulary word, we complete our Frayer model at that time. We are now roughly 7-10 minutes into class.

Rocking right on it’s time to get into the “meat” of the lesson for the day. Typically I did a flippable version of notes so that I could have something interactive to draw my students in for the lesson by keeping them on their toes. There are different ways to do this such a cloze notes, sort and stick (gluing notes that were already typed), or even having groups break into parts of the lesson and report back.
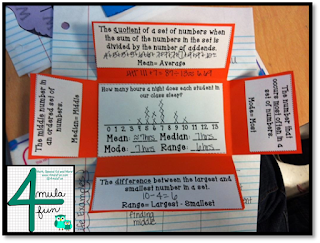 The most important part of this is to keep things flowing so that students are engaged. Doing this in my classroom made my off task behaviors virtually non-existent. Once I had done significant modeling with each individual class of students, I began picking a teacher helper during each class. This teacher helper was my INB Vanna during lessons and uncovered areas or completed their lesson under my document camera while I was monitoring and assisting while also teaching around the room.
There were days that I picked a student who was on the more active side and they were typically the BEST at modeling how a “Structure Sergeant” models a lesson. It’s amazing what they had picked up non-verbally from me over time.
 After roughly a 15-20 minute mini-lesson it was time for practice and application of skills. I am a huge proponent of not drilling and killing my students but rather relating it to a real-life problem that they may face sometime in life as well as making it interesting to them in some way. This lends to word problems so well. There were days where we only completed 2-3 problems and that was perfectly fine because then there were other days where we were able to complete a lot more through whole group practice, workstations, small group work, etc.
By this time we are ready to wrap things up. This is when I would pull in an Exit Ticket or my favorite, a “Post It, Prove It.” These two strategies give me immediate feedback on what each student has internalized and connected with in the lesson for the day which in turn allows me to determine students who need extra support, are on target and even those that are ready to move on to the next step.
 There are many days that you feel like you are going “balls to the wall” but students will catch on and get there with you. The key is to be patient and be flexible. You mind has to be open to helping your students create a resource that will benefit them for the rest of their lives by not only using them in your classroom (and those that build upon it) but also teaching them necessary organizing and studying skills to benefit their future.
Feel free to download this FREEBIE on how to incorporate Interactive Notebooks in a 45 minute and a 90 minute class.